17. Exercise: Adding a Menu
L3 26 Introducing Menus SCA
Update Note
In the video above, there is a mild update in the following two methods inTitleFragment.ktfile:
onCreateOptionsMenu()onOptionsItemSelected()
The updated code is shown in the instructions below. Alternatively, you can refer to the updated
TitleFragment.ktfile in the relevant branch of the andfun-kotlin-android-trivia repo.
Okay… let's add an About menu!
We’ll begin by adding the AboutFragment to the navigation graph.
1. Add AboutFragment to the navigation graph
Click the "add" button. A list of fragments and activities will drop down. Add fragment_about. Name it with the title_about_trivia string. Set its id to aboutFragment. The menu will need this id to navigate to the correct fragment.
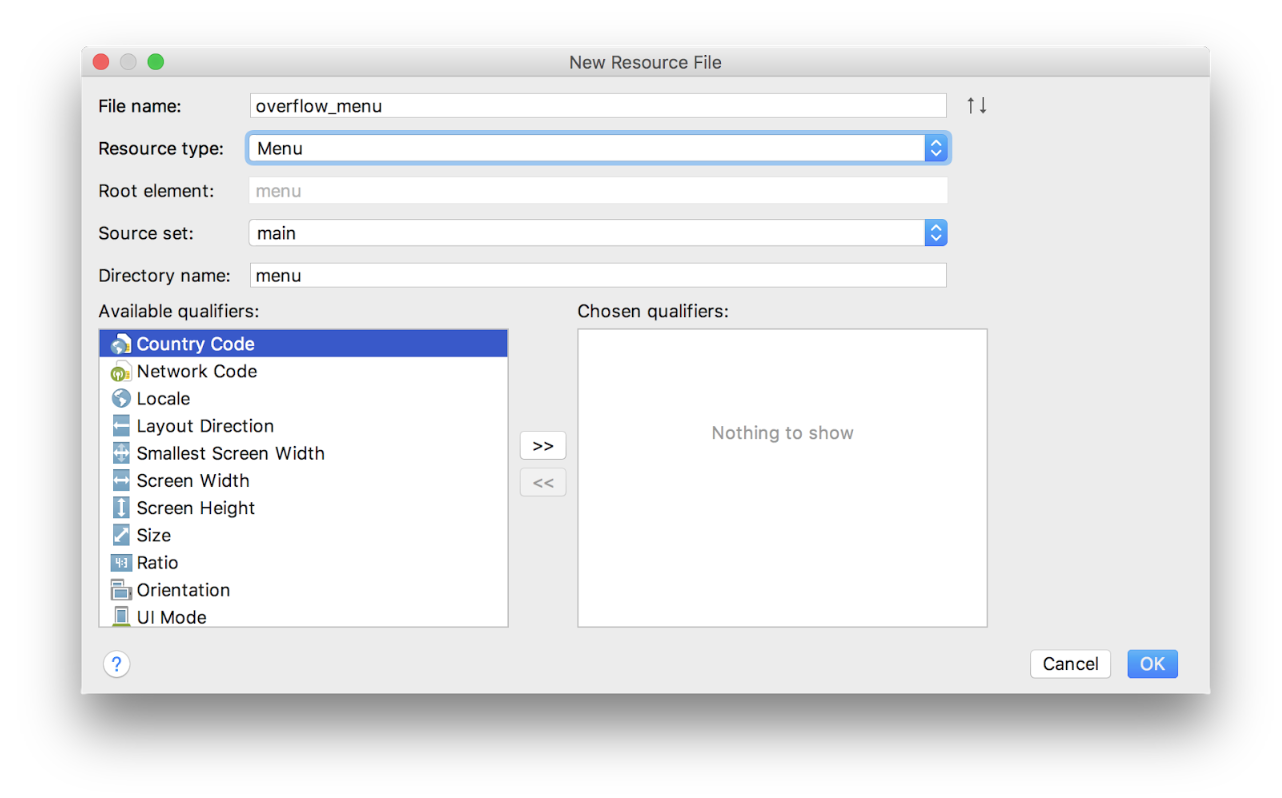
2. Create new menu resource.
Right click on the res folder within the Android project and select New Resource File. We’ll call this one overflow_menu, with resource type of Menu. Click on the overflow_menu within the menu directory, to view our new (empty) menu.
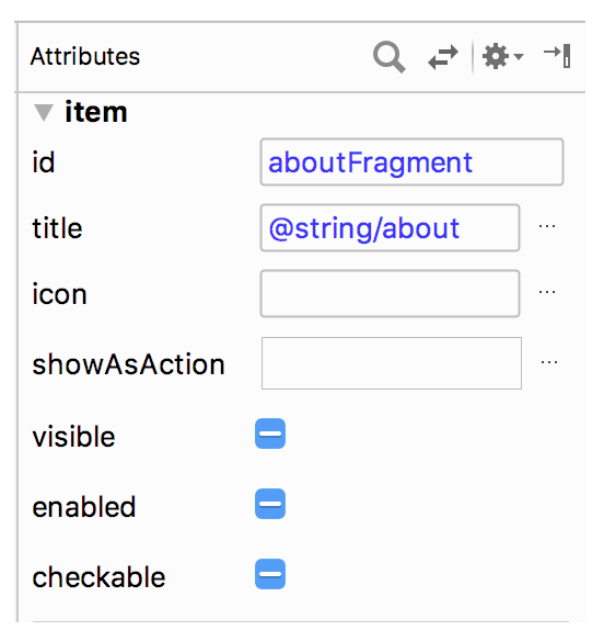
3. Create “About” menu item with ID of aboutFragment destination
Make sure the design tab is selected. Drag a menu item from the palette into the component tree below. Move to the attributes pane. Set the new item's id to aboutFragment, its destination. That's the id you used when adding the About fragment to the navigation graph. For title, we can use @string/about. The rest of the attributes should be left as their defaults.
4. Call setHasOptionsMenu() in onCreateView of TitleFragment
Next we need to tell Android that our TitleFragment has a menu. In onCreateView call setHasOptionsMenu(true).
override fun onCreateView(inflater: LayoutInflater, container: ViewGroup?,
                         savedInstanceState: Bundle?): View? {
   ...
   setHasOptionsMenu(true)
   return binding.root
}
5. Override onCreateOptionsMenu and inflate menu resource
Next, we need to override onCreateOptionsMenu and inflate our new menu resource using the provided menu inflater and menu structure.
override fun onCreateOptionsMenu(menu: Menu, inflater: MenuInflater) {
   super.onCreateOptionsMenu(menu, inflater)
   inflater.inflate(R.menu.overflow_menu, menu)
}
6. Override onOptionsItemSelected and call NavigationUI.onNavDestinationSelected
Finally, we need to override onOptionsItemSelected to connect it to our NavigationUI.
override fun onOptionsItemSelected(item: MenuItem): Boolean {
   return NavigationUI.onNavDestinationSelected(item, requireView().findNavController())
           || super.onOptionsItemSelected(item)
}
And that’s it. Run the app and enjoy the "About" feature we’ve just added to the title fragment.
If you want to start at this step, you can download this exercise code from: Step.06-Exercise-Adding-the-About-Menu.
You will find plenty of //TODO comments to help you complete this exercise, and if you get stuck, go back and watch the video again.
Once you’re done, you can check your solution against the solution we’ve provided here Step.06-Solution-Adding-the-About-Menu or diff.
Task Description:
Check the steps below as you implement them to complete this exercise.
Task Feedback:
And now you have a working About menu!
Solution: Step.06-Solution-Adding-the-About-Menu or git diff